Zupians Support Tutorials
Welcome to the comprehensive tutorial guide for Zupians Support platform.
Getting Started
Learn how to effectively use our centralized notification system for smarter engagement.
Quick Start Guide
- Dashboard Overview - Understanding your main control panel
- WhatsApp Integration - Setting up and managing WhatsApp business messaging
- Contact Management - Organizing and managing your customer database
- Notification System - Configuring alerts and notifications
- User Settings - Personalizing your platform experience
Tutorial Categories
WhatsApp Management
- Setting up WhatsApp Business API
- Creating message templates
- Managing broadcasts
- Handling support chats
- Setting up automated responses
Contact Organization
- Importing contact lists
- Creating contact groups
- Managing active/archived contacts
- Handling blocked contacts
System Configuration
- User management and roles
- Role templates setup
- Group permissions
- Troubleshooting common issues
Advanced Features
- Chatbot configuration
- Custom notifications
- API integrations
- Reporting and analytics
Support Resources
- Documentation: Complete feature documentation
- Video Tutorials: Step-by-step video guides
- FAQ: Frequently asked questions
- Support Chat: Get help from our support team
Next Steps
- Start with the Dashboard Overview
- Configure your WhatsApp Integration
- Set up your Contact Management
- Customize your System Settings
For additional help, contact our support team or visit our help center.
🌐 Overview
The Login module allows authorized users to:
- Access the support system securely
- Sign in using email & password
- Use Google Single Sign-On (SSO)
- Recover forgotten passwords
- Stay signed in using the Remember Me option
Only registered and active users can log in to the system. Disabled or inactive users will not be able to access the platform.
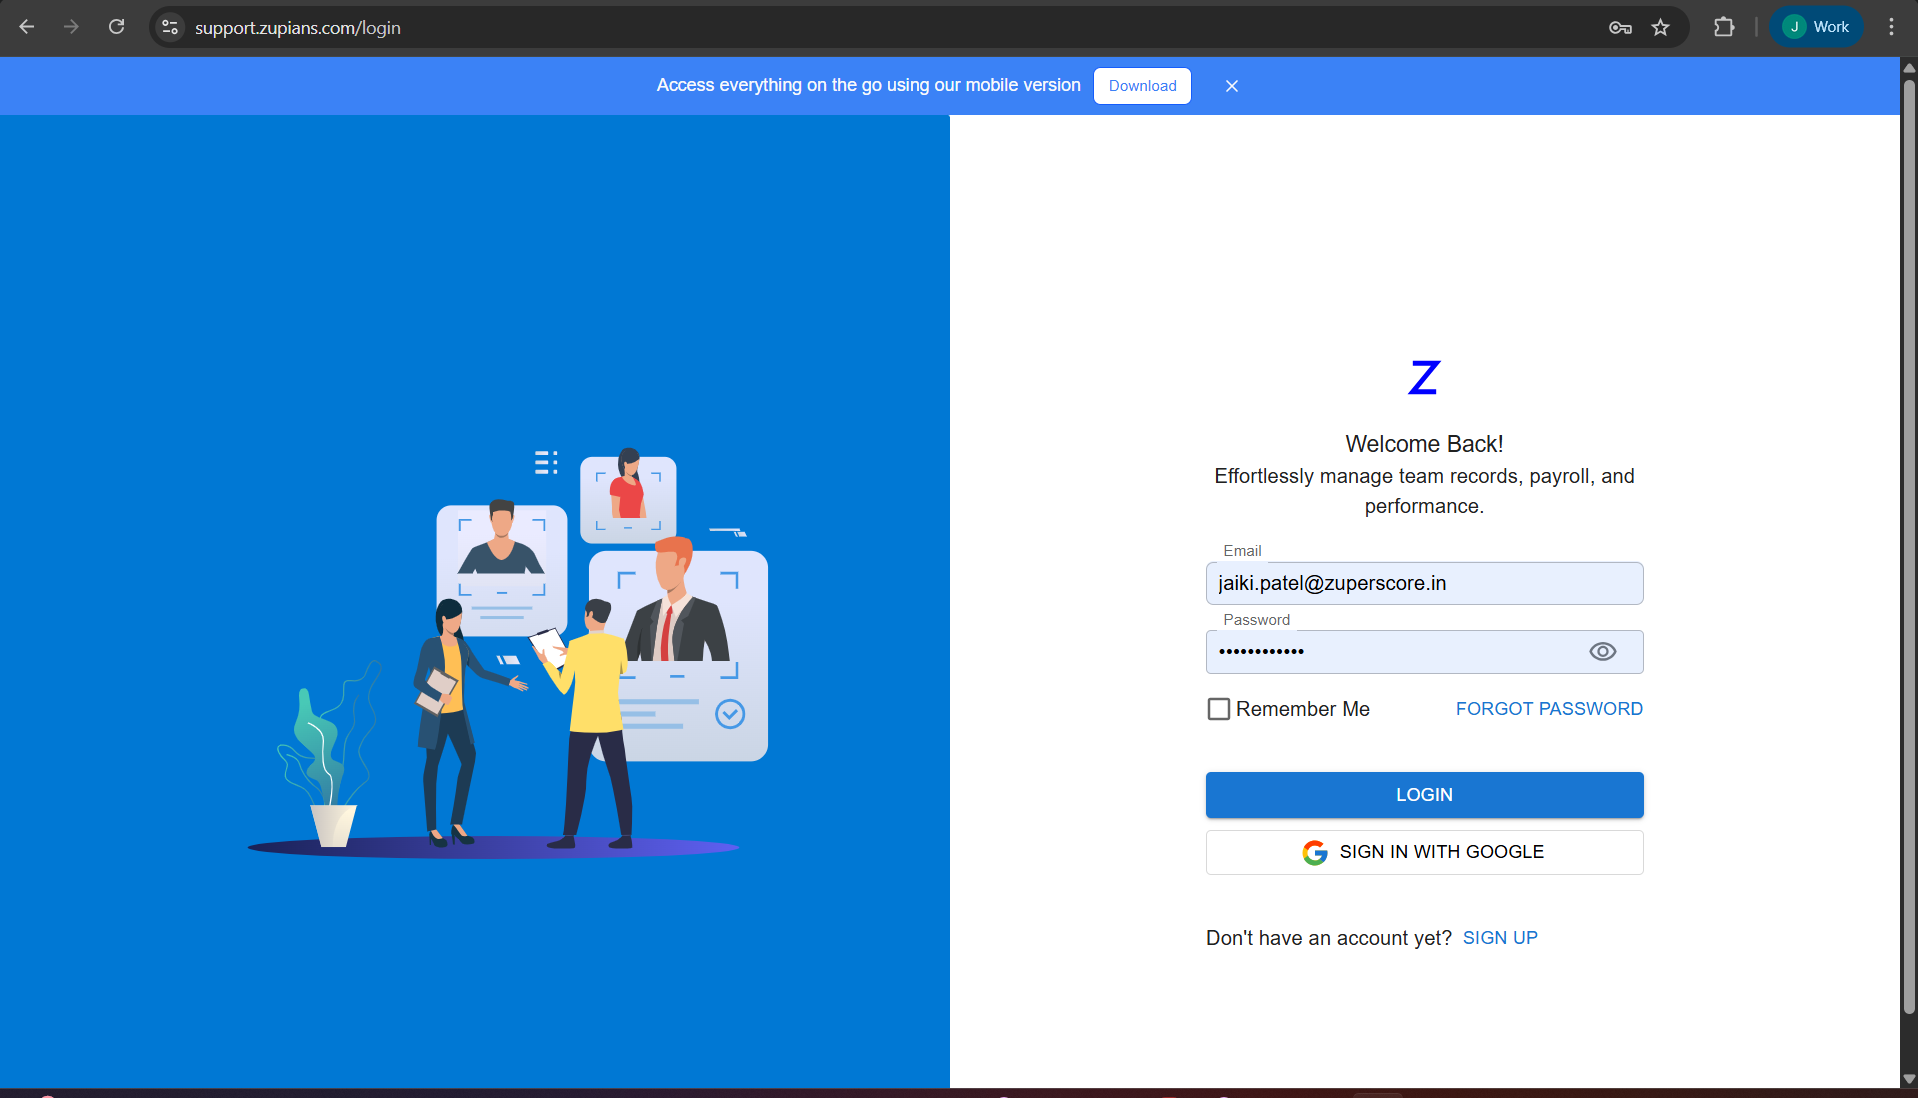
🖥️ Login Screen Layout
The login page is divided into two sections:
- Left Panel – Informational illustration and branding
- Right Panel – Login form and actions
🔐 Login Using Email & Password
✅ Steps to Login
- Open the login page: support.zupians.com/login
- Enter your registered Email address
- Enter your Password
- (Optional) Check Remember Me to stay logged in
- Click LOGIN
You will be redirected to the Dashboard upon successful authentication.
Use a secure, private device when enabling “Remember Me”.
🔑 Login Using Google (SSO)
For faster access, users can sign in using Google.
Steps
- Click SIGN IN WITH GOOGLE
- Select your registered Google account
- Approve access permissions
If your Google email is already registered in the system, you will be logged in instantly.
Google Sign-In works only if your email is already added by an Admin or invited to the system.
🔁 Forgot Password
If you cannot remember your password:
Steps to Reset Password
- Click FORGOT PASSWORD on the login screen
- Enter your registered email address
- Click SUBMIT
- Check your email for the reset link
- Set a new password and confirm
If the reset email is not received, check your spam folder or contact an Admin.
📝 Sign Up (New Users)
If you do not have an account:
-
Click SIGN UP at https://zupians.com/ login page
-
Complete registration using:
- Invite email, or Create User from User Management
- Admin-provided credentials or recieved on email
-
Set your password and submit
Self sign-up may be restricted based on organization settings.
⚠️ Common Login Errors & Solutions
| Issue | Possible Reason | Solution |
|---|---|---|
| Invalid credentials | Wrong email or password | Recheck details or reset password |
| Account disabled | User marked inactive | Contact Admin |
| Google sign-in fails | Email not registered | Ask Admin to add/invite you |
| Session expired | Inactivity or timeout | Log in again |
🔔 Security & Notifications
- Login activity may be logged for audit purposes
- Suspicious login attempts can trigger alerts
- Password changes invalidate old sessions
Always log out from shared or public computers.
🧪 Step-by-Step Workflows
🆕 First-Time Login
- Receive invite or credentials from Admin
- Open login page
- Set password (if prompted)
- Login successfully
- Land on Dashboard
🔄 Password Recovery
- Click Forgot Password
- Verify email
- Reset password
- Login with new password
✅ Best Practices
🔐 Account Security
- Use strong passwords
- Do not share credentials
- Enable Google Sign-In if available
- Log out after use on shared devices
🏃 Smooth Access
- Bookmark the login URL
- Keep browser updated
- Allow pop-ups for Google Sign-In
❓ Frequently Asked Questions (FAQ)
1. Who can log in?
2. Can I log in without a password?
3. What happens if I enter the wrong password multiple times?
4. I didn’t receive the reset email. What should I do?
5. Can I change my email address?
6. Does Remember Me work on all devices?
7. Is Google Sign-In mandatory?
8. Why am I redirected back to login?
📌 Summary
The Login module ensures secure access to the system by:
- Supporting email/password and Google SSO
- Providing easy password recovery
- Enforcing role-based access control
A smooth login experience is the first step toward efficient support operations.