WhatsApp Broadcasts
🌐 Overview
The WhatsApp Broadcasts module enables organizations to send pre-approved WhatsApp template messages to multiple recipients at scale. It is commonly used for notifications, reminders, announcements, and time-sensitive communication.
This module allows you to:
- Send one-to-many WhatsApp communications
- Use only approved WhatsApp templates
- Schedule broadcasts and track delivery status
👤 Access Requirements
Authorized users can access the WhatsApp Broadcasts module.
🧭 Navigation Path
WhatsApp → Broadcasts
📊 Broadcasts
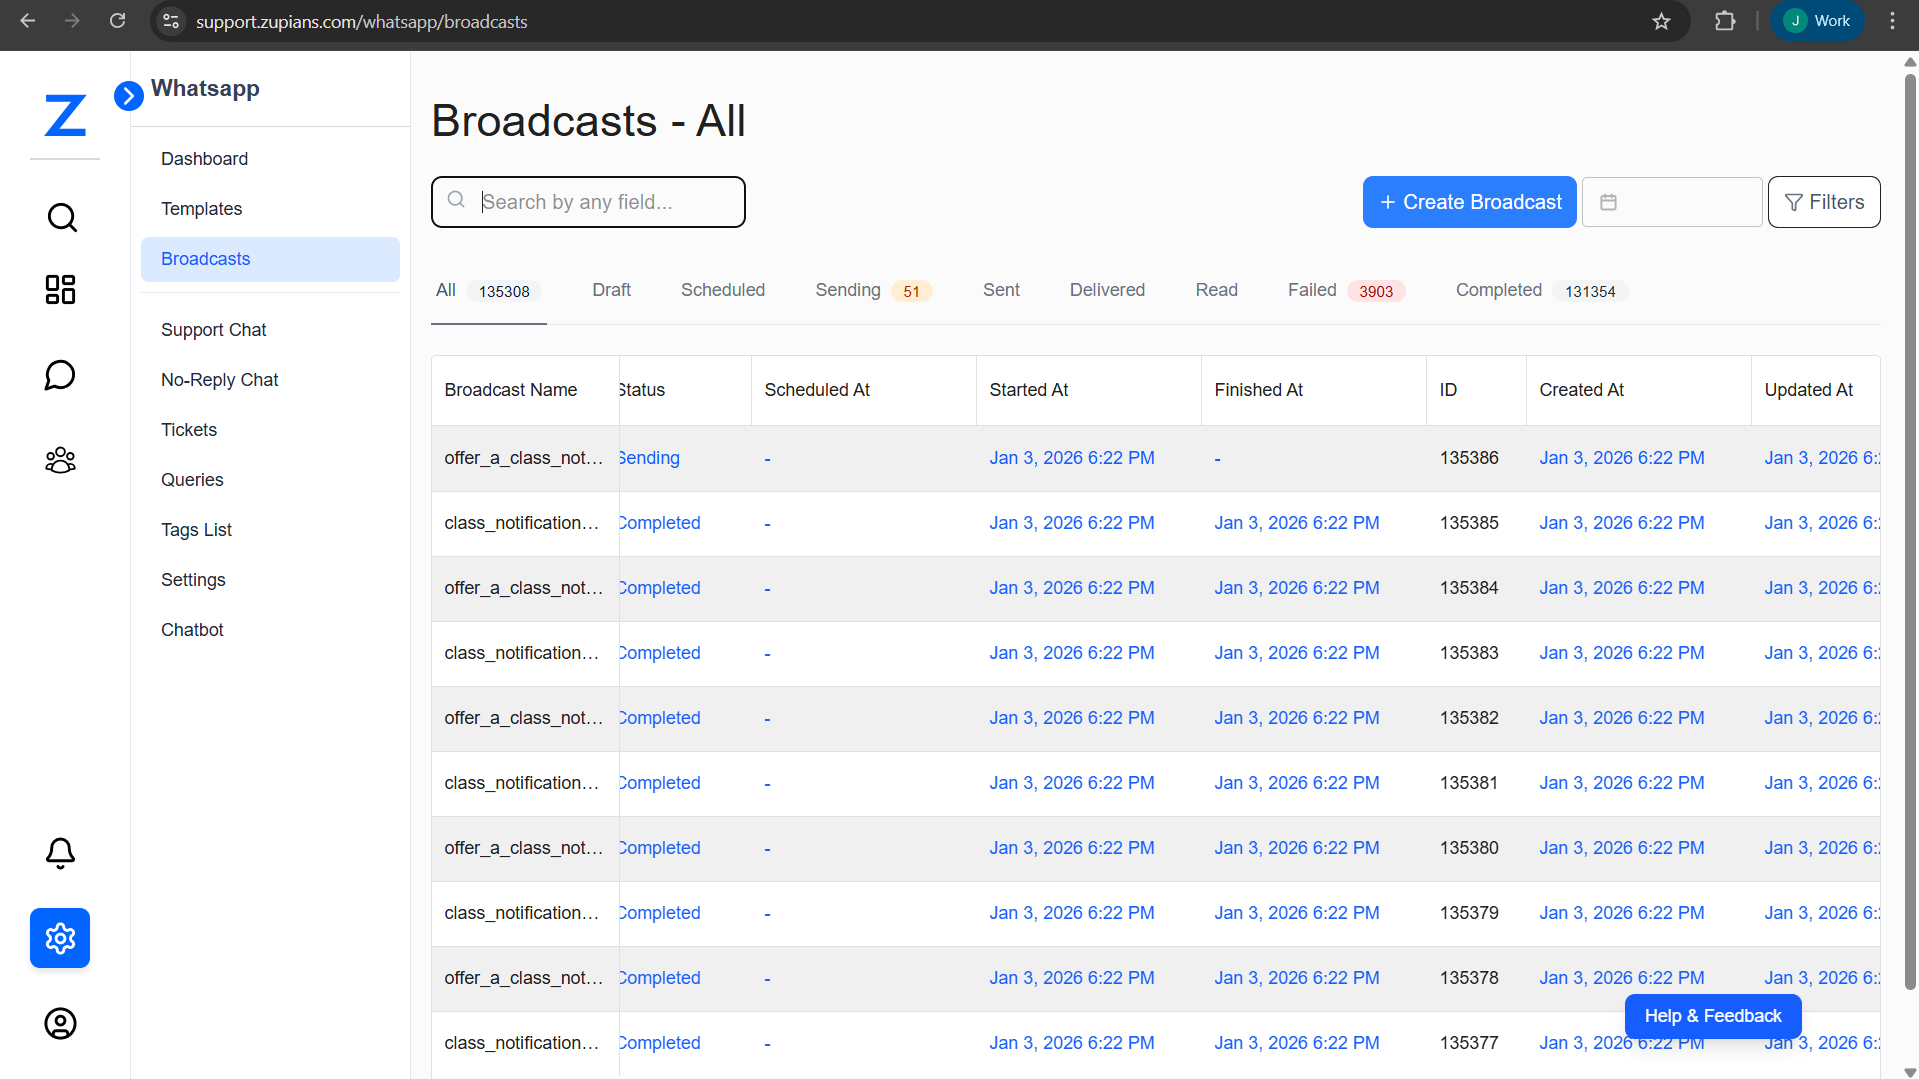
The Broadcasts displays a complete list of all WhatsApp broadcasts created in the system.
Features
- Search Bar – Search broadcasts by name, template name
- Status Tabs – Quickly filter broadcasts by status:
- All
- Draft
- Scheduled
- Sending
- Sent
- Delivered
- Read
- Failed
- Completed
- Create Broadcast – Create a new WhatsApp broadcast
- Filters – Filter broadcasts by date range and template
📋 Broadcast List Details
Each row in the broadcast list shows high-level information about a broadcast.
Columns Explained
| Column | Description |
|---|---|
| Broadcast Name | User-defined name for internal reference |
| Template Name | WhatsApp template used |
| Category | Template category (Utility / Marketing) |
| Status | Current broadcast status |
| Scheduled At | Scheduled send time (if applicable) |
| Started At | Time when sending started |
| Finished At | Time when broadcast completed |
| ID | System-generated broadcast ID |
🧪 Step-by-Step Workflows
📢 Create Broadcast
Creating a broadcast follows a guided, step-by-step process.
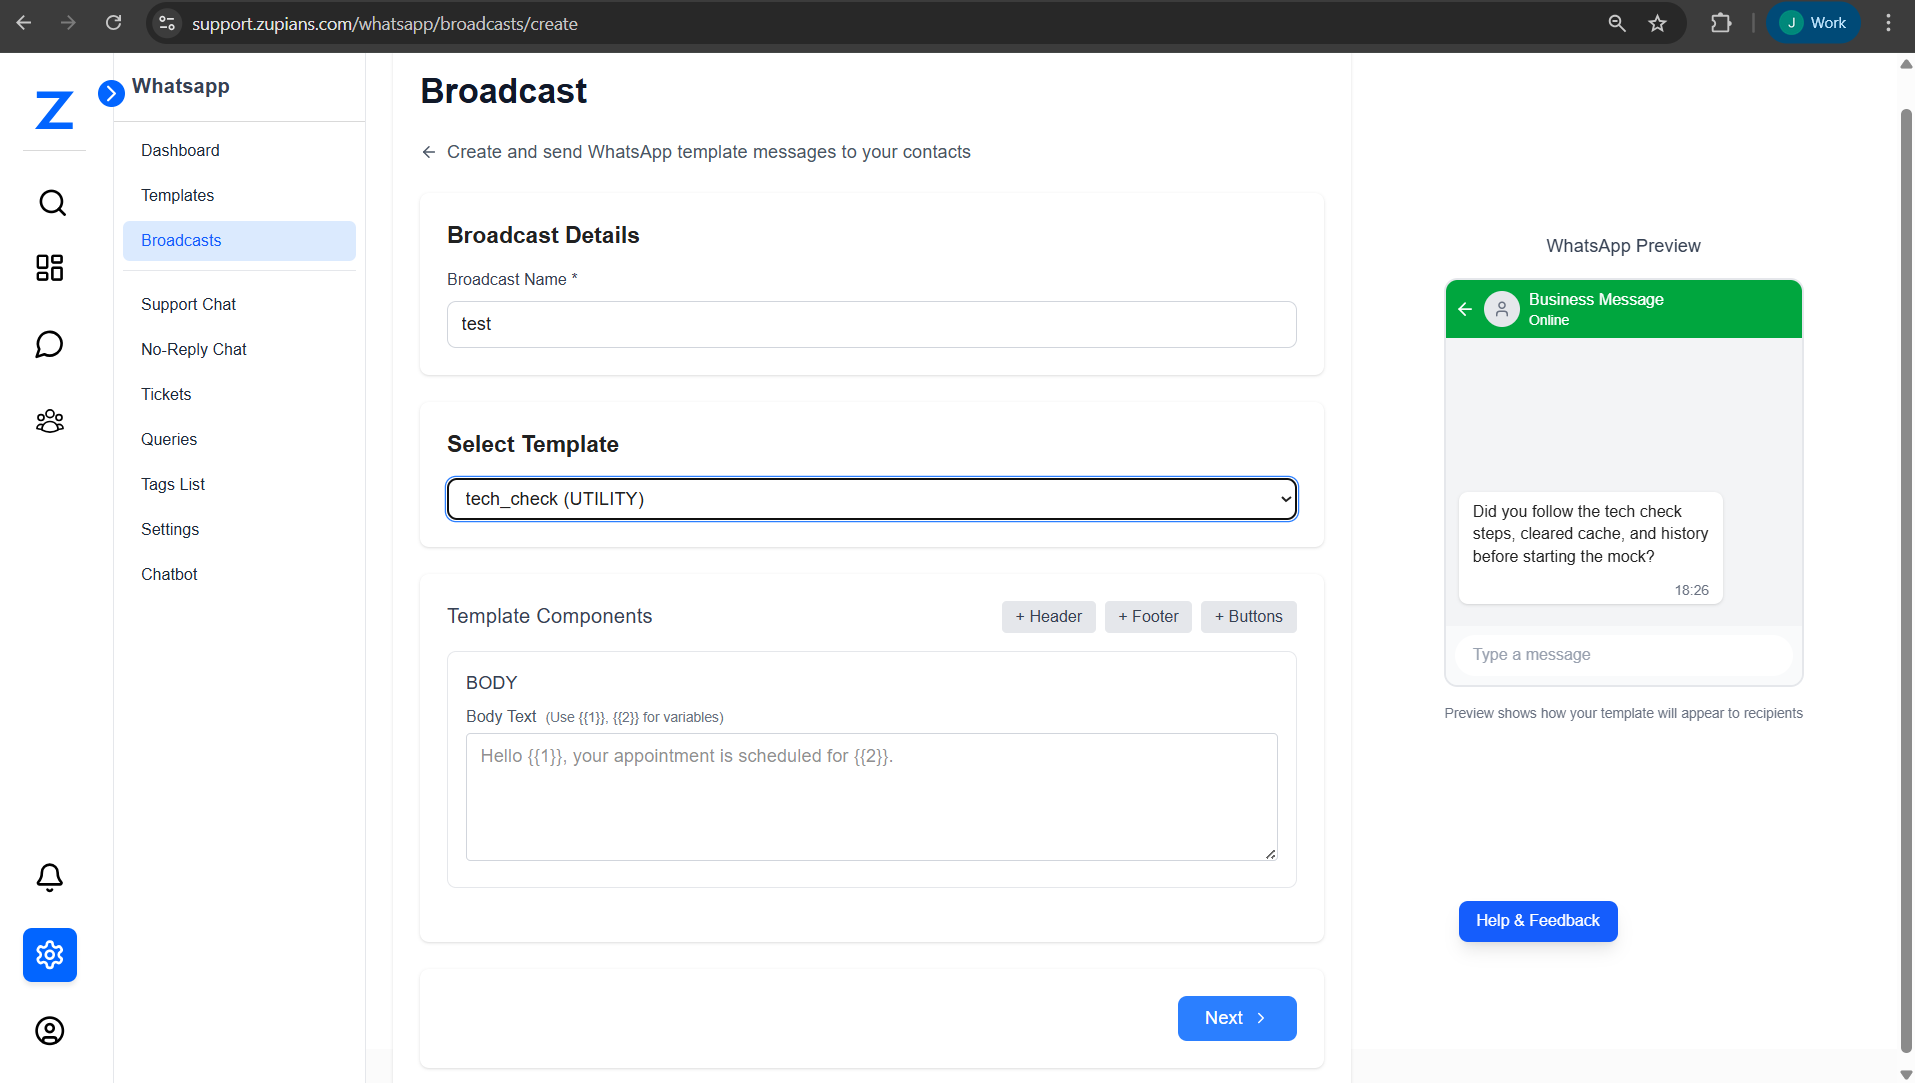
Step 1: Broadcast Details
- Click Create Broadcast from the Broadcasts Dashboard
- Enter a Broadcast Name
- Used for internal identification
- Select a WhatsApp Template
- Only approved templates are available
- Template category is displayed (Utility / Marketing / Authentication)
Once selected, the template structure loads automatically.
Step 2: Configure Template Components
Configure the template components based on the selected template.
Header (Optional)
- Format: Text
- Appears at the top of the message
Body (Required)
- Main message content
- Supports variables such as
{{1}},{{2}}
Buttons (Optional)
- Interactive action buttons
- Supported button types:
- URL
- Quick Reply
- Phone Number
Footer (Optional)
- Informational text displayed at the bottom
- Maximum length: 60 characters
Template Variables
Purpose
The Template Variables section allows you to define and map values for variables used inside WhatsApp message templates. These variables are replaced dynamically when a message is sent, enabling personalization and accurate delivery of template content.
Reserved Variables
Some variables such as name, email, and phone are reserved variables.
- These values are automatically fetched from the contact's data.
- You do not need to manually fill them.
- Only custom template variables need to be configured in this section.
ℹ️ Reserved variables are read-only and are populated at the time of message delivery.
Template Variable Configuration
Each template variable must be mapped before proceeding. For every variable, you can choose one of the following options:
Option 1: Use Contact Field
Map the template variable directly to an existing contact field.
Steps:
- Click on the Use Contact Field dropdown.
- Select the required contact field (e.g., First Name).
- Once selected, the system confirms that the variable will use the chosen contact data.
Example:
- Variable 1 mapped to First Name
- The message will automatically insert the contact's first name
Option 2: Enter Manual Value
Provide a fixed custom value for the template variable.
Steps:
- Locate the Enter Manual Value input field.
- Type the custom value required for the variable.
- This value will be used for all recipients in the broadcast.
Example:
- Variable 2 set as
Orientation Program - All recipients will receive the same value in the message
Variable Details
Variable 1 (Required)
- Label: Template variable 1
- Mandatory field
- Can be mapped to a contact field or filled with a manual value
Variable 2 (Required)
- Label: Template variable 2
- Mandatory field
- Requires either a contact field selection or a manual value
⚠️ All required variables must be completed to proceed.
Actions
Fill Sample
- Automatically populates variables with sample values
- Useful for previewing the message format
Clear All
- Removes all selected contact fields and manual values
- Allows you to start the configuration again
Next
- Validates all required variables
- Proceeds to the next step in the broadcast workflow
Notes
- Variable order must match the order defined in the WhatsApp template.
- Incorrect or missing variable values may cause message delivery failure.
A WhatsApp Preview appears on the right to validate formatting and content.
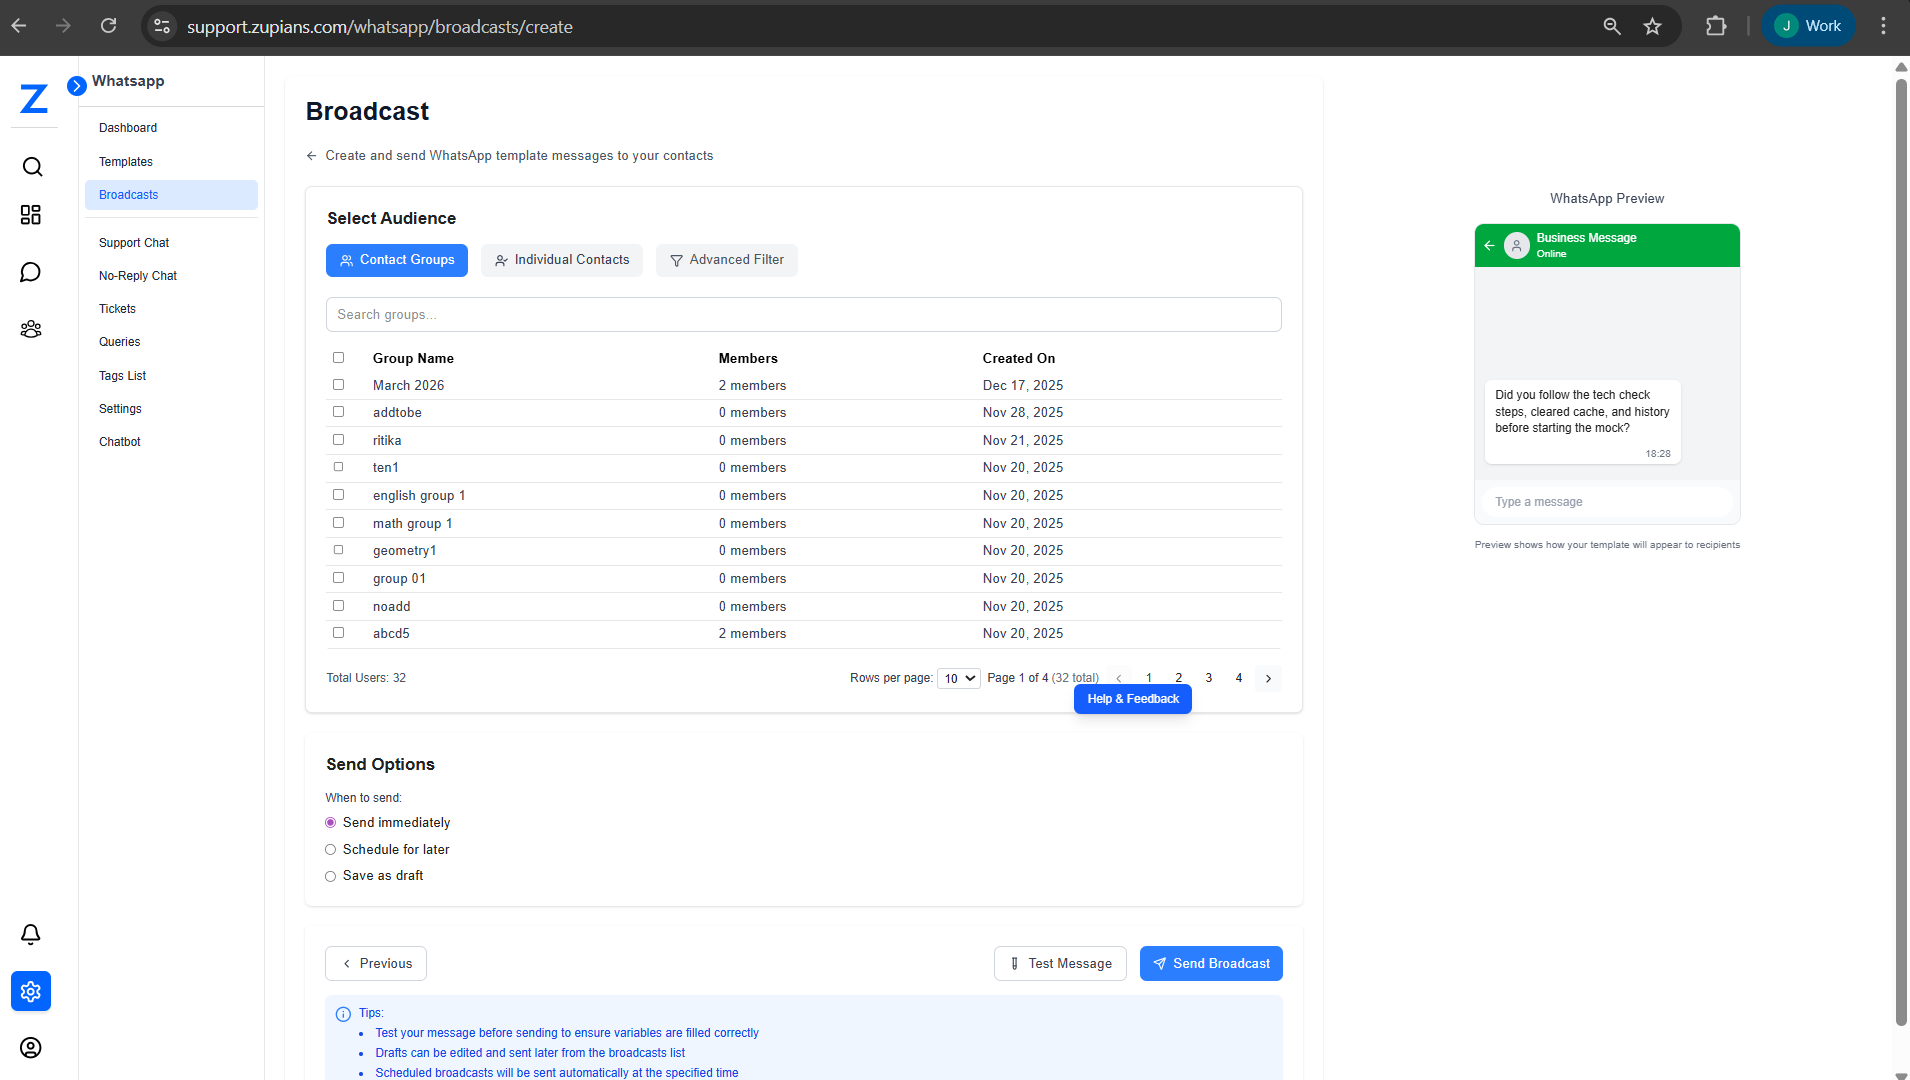
Step 3: Select Audience
Choose the recipients for the broadcast.
Available options:
- Contact Groups – Select predefined groups
- Individual Contacts – Select specific contacts
- Advanced Filter – Dynamically filter recipients using:
- Parent Name / Email
- Target Test Date
- Parent Mobile Number
- Passing Year
- Mobile Number
The total number of selected recipients is displayed at the bottom.
Step 4: Send Options
Choose how and when the broadcast should be sent.
Available options:
- Send Immediately – Send the broadcast instantly
- Schedule for Later – Select a future date and time
- Save as Draft – Save and complete later
For scheduled broadcasts, set the Schedule Time accordingly.
Step 5: Test & Submit
Before sending the broadcast:
- Click Test Message to verify variables and formatting
- Review the WhatsApp Preview
Click Schedule Broadcast or Send Broadcast to complete the process.
🔄 Broadcast Status Lifecycle
A broadcast moves through the following statuses:
- Draft – Saved but not scheduled or sent
- Scheduled – Scheduled for future delivery
- Sending – Messages are being sent
- Sent – Messages sent to WhatsApp
- Delivered – Messages delivered to recipients
- Read – Messages read by recipients
- Failed – Message delivery failed
- Completed – Broadcast process finished
⭐ Best Practices
- Always send a test message before broadcasting by
- Enter your WhatsApp number (with country code, e.g., +1234567890)
- Ensure template variables are correctly mapped
- Schedule broadcasts during high engagement periods
- Monitor delivery, read, and failure metrics after sending