Support Chat Guide
This guide explains how to use the WhatsApp Support Chat module to manage incoming student queries, respond to messages, track conversation status, and configure chat automation effectively.
🌐 Overview
The Support Chat module enables real-time WhatsApp communication between students and the support team. It provides a centralized workspace to:
- View and manage incoming WhatsApp messages
- Respond manually to student queries
- Track chat status (Active, Pending, Resolved, Closed)
- Configure reply modes and automation rules
Authorized users with WhatsApp support permissions can access Support Chat.
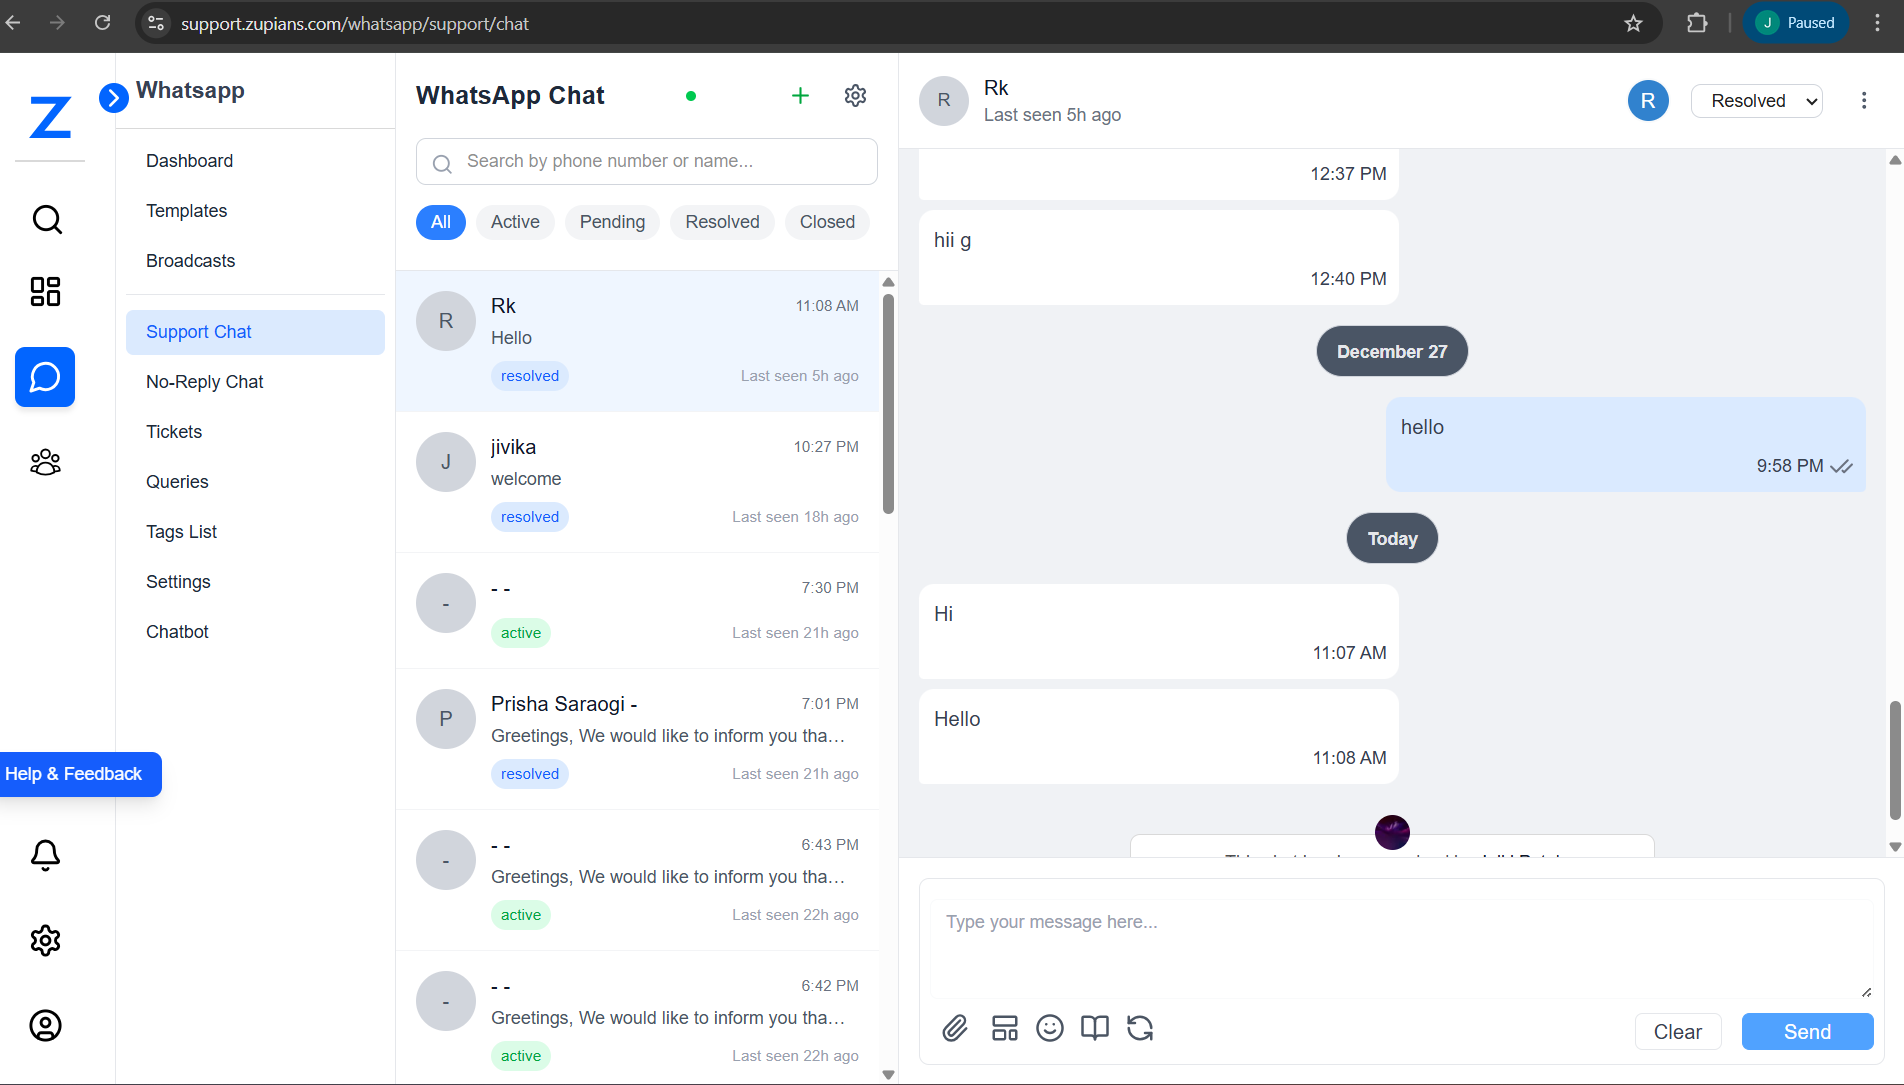
🧭 Support Chat Layout
The Support Chat screen is divided into three main sections:
- Sidebar Navigation
- Chat List Panel
- Conversation Window
📂 Sidebar Navigation
The left sidebar provides access to WhatsApp-related modules:
- Dashboard
- Templates
- Broadcasts
- Support Chat
- No-Reply Chat
- Tickets
- Queries
- Tags List
- Settings
- Chatbot
Use this navigation to quickly switch between WhatsApp modules.
💬 Chat List Panel
This section displays all WhatsApp conversations.
Features
- Search chats by phone number or name
- Filter chats using tabs:
- All – All conversations
- Active – Active Chats
- Pending – Pendinge chats
- Resolved – Completed conversations
- Closed – Archived chats
Each chat item shows:
- Contact name or identifier
- Last message preview
- Chat status badge
- Last seen timestamp
🎫 Raise Ticket
You can raise a ticket directly from an individual WhatsApp chat for better tracking and follow-up.
Steps:
- Open the required Support Chat.
- Click on the three-dot (⋮) menu located on the right side of the chat status.
- Select Raise Ticket.
- You will also see Chat Settings for the individual chat.
- Select the message(s) for which you want to raise a ticket.
- Click Continue.
- On the next screen:
- Enter the ticket description
- Select one or more tags from the existing list
- If the required tag is not available:
- Click Create Tag
- Add a new tag and save it
- Confirm the selection (e.g., 1 Chat Selected).
- Click Create Ticket.
✅ A confirmation message appears indicating that the ticket has been raised successfully.
👤 View Contact Information
You can view detailed contact and student profile information directly from any Support Chat.
Steps:
- Click on the chat for which you want to view contact information.
- The Contact Profile panel opens automatically.
- Navigate to the Profile Details tab to view complete contact and student information.
📄 Profile Details
The Profile Details tab displays the following information:
Basic Information
- Name: Jaiki Patel
- Program: Math Only – STAGE_1
- Student ID: 165855
Contact Information
- Email Address: jaiki.patel@zuperscore.in
- Mobile Number: +91 8285751425
- WhatsApp Number: +91 8285751425
Academic Details
- School: 10X International School, Bangalore
- Curriculum: IB
- Program Variant: Math Only
- Course Type: Flagship
- Year of Passing: 2017
- Stage: STAGE_1
- Class Start Date: November 10, 2025
- Target Test Date: December 6, 2025
- Latest Test Score: SAT – Math 800, English 720 (2025-11-08)
Compliance & Limits
- English Compliance: Non-compliance
- Math Compliance: Non-compliance
- Daily Limits:
- Writing: 1
- Reading: 1
- Math: 1
- Homework Time Limit: 24 hours
Parent Details
- Parent 1 Email: Not available
- Parent 1 Contact: Not available
- Parent 2 Email: Not available
- Parent 2 Contact: Not available
Assigned Team details with name and email
- Operations Manager:
- Prep Manager:
- SSO Manager:
- Math Tutor:
- English Reading Tutor:
- English Writing Tutor:
Additional Details
- Student Status: Active
- Timezone: Asia/Kolkata
🕒 Timeline Tab
The Timeline tab shows the complete history of chat activity and status changes for the selected conversation.
Status Change History
-
Status Changed: Resolved → Active
Date & Time: Jan 02, 09:58 AM
Changed By: Esha Mehta -
Status Changed: Active → Resolved
Date & Time: Jan 01, 11:37 PM
Changed By: Admin Zupians -
Status Changed: Resolved → Active
Date & Time: Jan 01, 11:35 PM
Changed By: Admin Zupians
Use the Timeline tab to audit conversation handling and track when and by whom chat statuses were updated.
🗨️ Conversation Window
The conversation panel displays the complete chat history with the selected contact.
Capabilities
- View messages with timestamps
- Send manual replies
- Attach files and emojis
- Track sent and delivered messages
- Update chat status (Active / Resolved / Closed)
At the bottom, agents can type messages and click Send to respond.
📌 Chat Statuses Explained
| Status | Description |
|---|---|
| Active | Chat requires agent action |
| Pending | Temporarily inactive conversation |
| Resolved | Issue addressed and conversation completed |
| Closed | Chat is finalized and archived |
⚙️ Chat Automation Configuration
Support Chat provides organization-wide automation settings.
To open configuration:
- Click the Settings (⚙️) icon in Support Chat
This opens Chat Automation Configuration.
🧩 General Settings (Reply Mode)
Defines how incoming WhatsApp messages are handled.
Reply Modes
-
Manual Reply
- Agents respond to all messages manually
-
Away Mode
- Automatically sends away messages
-
AI Reply (Coming Soon)
- AI-powered automated responses
Additional fields:
- Organization ID (auto-filled)
- Channel (Support / No-Reply)
- Status (Active / Inactive)
Click Save Configuration to apply changes.
📭 Away Messages Settings
Used to automatically reply when agents are unavailable or when using No-Reply channels.
Configuration Options
- Enable Away Messages
- Away Message – Message sent to users
- Rate Limit (Minutes) – Minimum interval between messages sent to the same contact
Example Message:
This is a no-reply number. Please write on the student’s WhatsApp group.
When enabled, a confirmation message indicates that away messages are active.
🤖 Automation Settings
These settings help manage chat lifecycle automatically.
Available Features
-
Auto-Reactivate Resolved Chats
- Reopens resolved chats when a new message arrives
-
Stale Chat Cleanup
- Moves inactive chats to Pending status
-
Cleanup After (Hours)
- Time before inactivity triggers cleanup
🧪 Step-by-Step Workflows
💬 Handling Student Queries
- Open Support Chat
- Select an Active chat
- Review the student’s message
- Send a reply
- Mark the chat as Resolved once completed
⚙️ Configuring Away Messages
- Open Chat Automation Configuration
- Go to Away Messages
- Enable Away Messages
- Enter the away message text
- Set rate limit
- Click Save Configuration
🏃 Support Efficiency
- Monitor Active chats frequently
- Resolve chats promptly to reduce backlog
❓ Frequently Asked Questions (FAQ)
1. Who can access Support Chat?
2. Are replies sent automatically?
3. What happens if a resolved chat receives a new message?
4. What is No-Reply chat?
5. Can I disable automation?
📌 Summary
The Support Chat module helps you:
- Respond to student WhatsApp queries efficiently
- Track conversation status clearly
- Automate chat handling where needed
- Maintain an organized and responsive support workflow
Use it daily to ensure timely and effective student support.